Archive
AI Code Tech Debt

The Double-Edged Sword of AI in Code Development
In the modern software development landscape, Artificial Intelligence has emerged not just as a tool for automation but as a catalyst that dramatically accelerates code generation. Tools powered by Large Language Models can now produce complex functions in seconds, seemingly solving years of work almost instantaneously. However this rapid surge in productivity brings with it an unexpected and potentially costly companion: Technical Debt specifically engineered to be far more insidious than traditional shortcuts taken by human developers.
The Mechanism Behind AI-Generated Code Debt
To understand this phenomenon, one must look at how these models actually function. Unlike human programmers who can trace their logic back through a mental sandbox or verify every condition manually LLMs are probabilistic engines predicting the next token based on patterns seen in vast datasets of existing code. This means that while AI is incredibly efficient at producing syntactically correct and contextually relevant solutions to new problems essentially writing perfect-looking spaghetti it often lacks true logical depth regarding security best practices or long-term maintainability.
The critical issue lies in the model inability to see outside its training data meaning it cannot inherently understand if a specific piece of generated code violates industry standards for secure coding. Consequently developers are often presented with solutions that work immediately but may introduce hidden vulnerabilities or inefficiencies.
The Critical Summary
AI Code Tech Debt is a critical new frontier for software architects and security professionals. It represents the accumulation of code that appears efficient but relies on patterns found in vast datasets rather than deep logical reasoning introducing latent vulnerabilities and making refactoring exponentially harder over time.
The core takeaway is clear while AI can significantly boost productivity it demands a heightened level of skepticism from developers. Organizations must implement rigorous code review processes that specifically audit for the probabilistic errors introduced by LLMs and prioritize security-by-design principles to prevent this rapidly accumulating debt.
The Path Forward
To mitigate these risks the industry is looking toward better integration of static analysis tools trained specifically on security vulnerabilities within AI workflows. The solution isn’t to reject AI technology but rather to evolve our development practices treating AI suggestions as drafts that require human validation and strict adherence to secure coding standards before deployment.

WSL Christmas with Fedora
Hey folks – Merry Xmas.
For those of you playing with the windows subsystem for Linux, I wanted to share a great recipe and the steps required for baking your very own Xmas Fedora Docker running on WSL. It makes a great holiday gift to share with your friends and family (because who doesn’t use containers these days!)
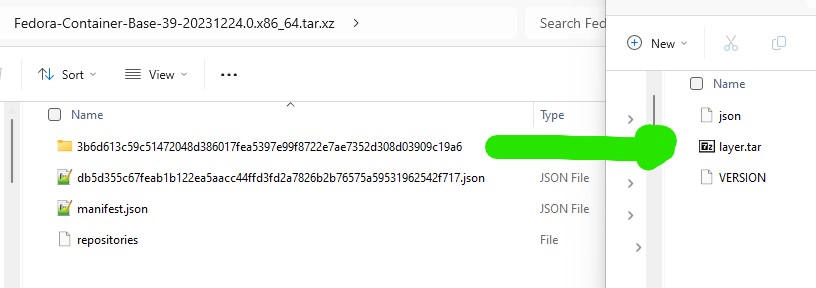
- Download your new base image from Koji at https://koji.fedoraproject.org/koji/packageinfo?packageID=26387

2. Carefully open the package and extract the file called layer.tar
3. Mix well for a few seconds (here we have renamed the layer.tar file and used ‘fedora39’ as the image name but you may adapt this ‘to your own taste’

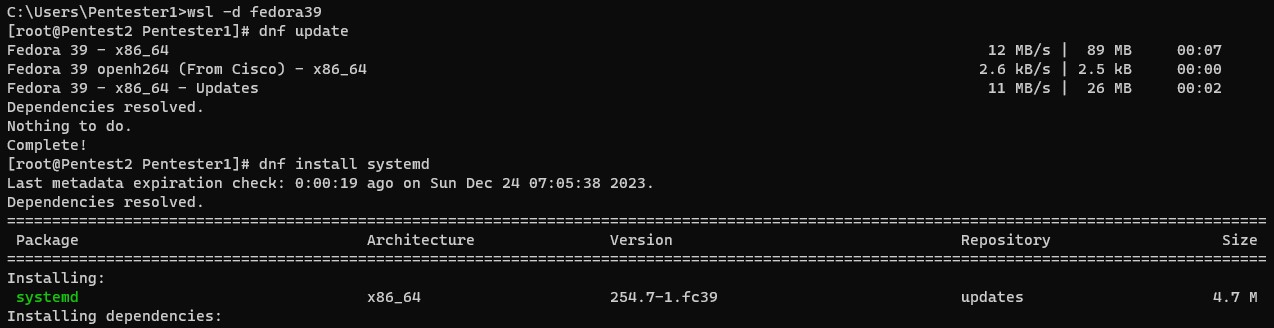
4. Bake in the oven for a few minutes (here we start the distro, perform an update and then install systemd)
5. Decorate it with a custom file to activate systemd and let it cool down (restart)

6. Package your cake with the following items (dnf-plugins-core)

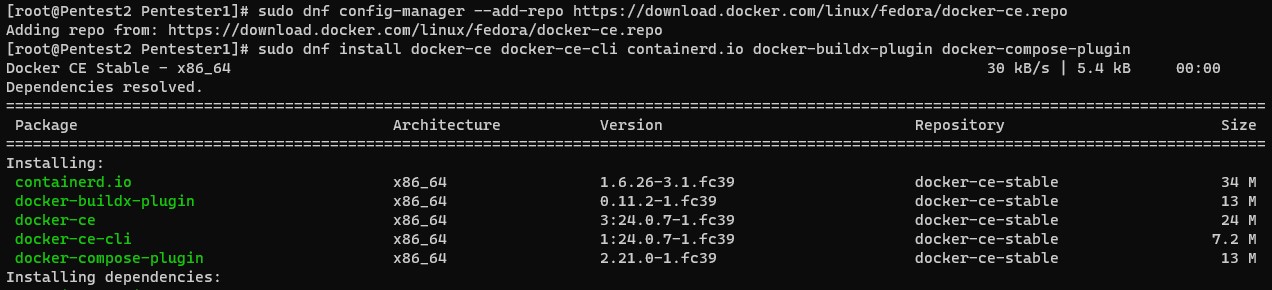
7. Add the docker community repository for docker binaries and install the following components (docker-ce, docker-ce-cli containerd.io, docker-buildx-plugin and docker-compose-plugin)
That is it – Serve to friends and family!
Happy Holidays to all my readers and thanks for a great year!
Zero-Day Exploitation of Atlassian Confluence | Volexity
There is another 0-day for Atlassian, they are having a tough time with RCEs
https://www.volexity.com/blog/2022/06/02/zero-day-exploitation-of-atlassian-confluence/
Want to recover some space on your ESXi server–read on
I wanted to tell my readers about a great tool I found from those creative people at Quest Software called vOptimizer. This tool is an essential part of any virtual administrators toolbox.
You start by connecting to your ESXi server and create a Project. This project will use a boot ISO uploaded by the windows client wizard during initialization and it will allow you to run a disk optimization that can do things like removing old temp files all the way to resizing your VM disk!

We started by connecting to a Windows 2003 VM on our ESXi 5 server that was grossly oversized at 40G. This project was setup to remove every excess file (including removing the swap file) and once we had successfully ran the disk optimizer we were left with a running server that was only about 11G in size. The entire process only took about 40 minutes of downtime.

We checked the ESXi summary before it was completed (left) and after (right).

Now I used to run a gparted iso and change the size of the disk and then expand the NTFS partition to make a disk larger but this trick allows you to make it bigger or smaller.
Unfortunately is does not work for LVM disks and with most of the Linux distros moving towards this default installation we are still looking to resolve this issue (gparted still doesn’t support it either).
(BTW this tool cannot optimize a VM if there is a snapshot so you will need to back it up first and then remove the snapshot before you can run the optimizer. This is true for windows vms as well).
After 30 days this tool will run as a free tool and only optimize 2 VMs but it is still a handy tool to have in your toolbox.
